The best way to teach science is to show what it looks like in action. Sixth graders are still new to most scientific concepts, and the best way to get them interested is to allow them to experiment. Here are five science experiments that they must try.
1. Carbon Snake
The carbon snake experiment may be messy, but it’s a great way to teach your kids how chemical and thermal reactions take place. Make sure to supervise the entire experiment as it includes some potentially harmful substances. Here’s what you’ll need for it:
- Sand
- Lighter fluid
- Matchbox/lighter
- 4 tsp powdered sugar
- 1 tsp baking soda
- Bowl
- Pie tin
In a bowl, mix powdered sugar and baking soda. Next, you add sand to a pie tin and make sure it’s properly settled. Make a small mound on top with your finger and pour the lighter fluid into it. Keep pouring until the sand is entirely soaked with lighter fluid. Use a spoon to put the sugar-baking soda mixture inside the indentation.
Once done, you need to burn the sand with a matchstick or a lighter (CAUTION: Adult supervision is important for this step). The mixture will start burning in a few minutes, and the snake will begin to take form. The snake can continue to grow for the next 20 minutes.

2. Floating Ping-Pong
In sixth grade, the students start getting acquainted with theories like Bernoulli’s Effect. The best way to make them understand this concept is by doing a simple science experiment with them. It can help them apply it to bigger concepts like how the airplane flies. Here’s what you’ll need to execute the experiment successfully:
- 1-liter bottle
- Bendy straw
- Nail
- Scissors
- Ping-pong ball
Cut the top two inches of the bottle (the end with the lid) with a cutter or scissors. Make sure the lid is tightly screwed onto the cut top. With a nail, poke a small hole in the lid and put the short side of the bendy straw through the hole. Make sure the straw is tightly wedged inside the hole, so there’s no leakage.
Once this is done, start blowing on the long end of the straw and place the ping-pong ball in the open side of the bottle. You’ll see that the ball is levitating as you blow!

3. Teeth-Staining Experiment
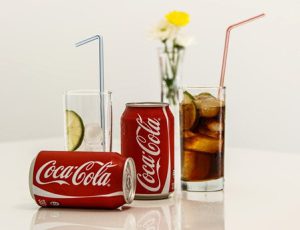
It’s important to teach the kids how beverage can affect their health. For this reason, a teeth-staining experiment can be a great way for them to see their harmful effects in real-time. Here’s what you need for this experiment:
- Three eggs
- Coke
- Tea
- Coffee
- Three jars
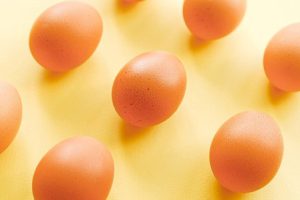
Put coffee, tea, and coke in the three separate jars and gently place eggs inside each one of them. Observe the discoloration of the eggshell (which resembles the teeth enamel) every day at the same time and note down your readings. After day 3, you should know which beverage causes the most damage.

4. Effects of Oil Spill
Oil spills are devastating to marine life and the environment at large. Children need to be well-versed in the negative impact of this horrendous human activity and how it’s slowly killing our planet. Here are all the things you’ll need for this experiment.
- Cheesecloth
- Spoon
- Modeling clay
- Toy animals
- Cake dish
- Olive oil
- Water
In a cake dish, add some green modeling clay to show the land near the sea. Next, pour two spoons of olive oil in the water. Ask the sixth graders to observe how the oil moves around in the water.
Next, ask them to place a toy animal in the water. Tell them to see how quickly the oil covers them and leaves them all slippery. Encourage them to take it out and see how long it takes for it to be cleaned.
Once all this is done, ask the sixth graders to use the cheesecloth to take the oil out through absorption. They can observe that the absorption technique works to some extent. Next, ask them to use a spoon to scoop out the oil. They may find this very difficult as the oil moves every time the spoon comes near it. In the end, ask them to use dish soap to get the oil to move. The soap may end up polluting the water even more.
Ask them to share their insights for each alternative method used in the process and let them know how oil spills are taken care of in the real world.
5. Naked Eggs
Later down the road, the sixth-grader will be exposed to more advanced science levels, including the study of acids and bases. The naked egg experiment is a good start and can surely get them acquainted with these essential substances.
This is a simple experiment but one that requires patience. Here’s what you need to carry it out successfully:
- Vinegar
- Egg
- Jar
All you have to do is fill the jar with vinegar and gently place the egg inside it. Make sure that the egg is entirely submerged in the vinegar. Once this is done, all you have to do is wait.
After 12 hours, you’ll start seeing a foamy layer on top, which is the remnant of the eggshell. After two days, you can use a spoon to take the egg out of the jar and voila; you’ll have a naked egg! This is a great way to understand how the acid in the vinegar reacts with the base in the eggshell.
Take It One Step Forward
You can continue the naked egg experiment to include the effect of osmosis. Place the naked eggs in vinegar, corn syrup, and water. You can observe water moving in or out of the egg membrane as the liquid gets balanced on either side. Depending on the solution you’ve placed the egg in, you may see shrinkage, expansion, or no change.

Make Your Child a Mini Scientist with Access2Success
Are you looking for science tutoring services for your child? Now you can get your child enrolled in the best online tutoring sites, such as Access2Success, which provides you comprehensive live K-8 online tutoring in subjects such as Math, English, and Science.
You’ll find qualified online tutors for science who will get your child interested in learning. Get in touch today to learn more about how we can help.
